Table of Contents
Toggle01CNC Machining Prototypes: A Practical Guide to Fast, Accurate, and Reliable Results
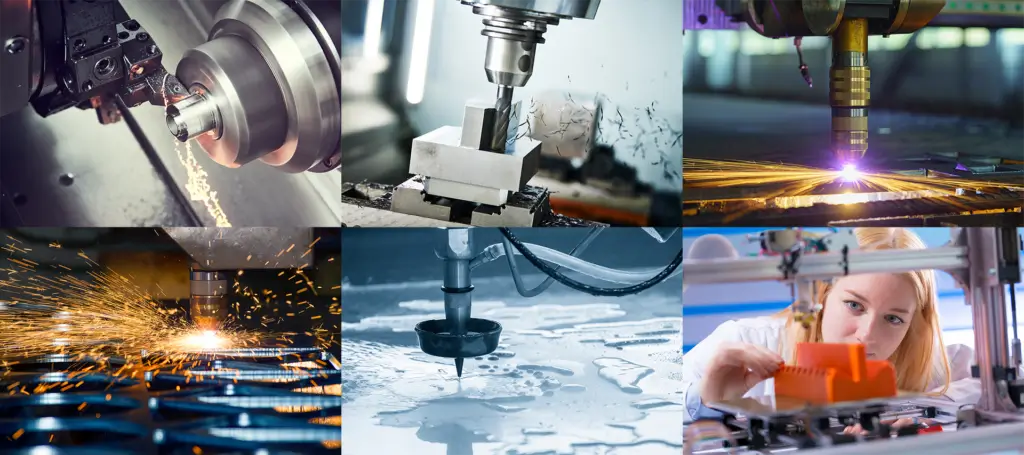
When you need a functional prototype that closely matches the final production part, CNC machining is still one of the safest choices. It preserves the real material strength, hardness, and machining behavior while allowing you to verify dimensions, tolerances, assembly fit, and structural performance. Compared with models made only for visual review, CNC machined prototypes are better suited for engineering tests, low-volume trials, and pre-production validation.
Before placing an order, prepare the STEP file, 2D drawing, material grade, tolerances, surface finish, and key inspection dimensions. At YPMFG, these details are usually reviewed early in prototype machining projects to confirm manufacturability and avoid assembly or performance issues after the part is made. This guide helps engineers, product designers, and procurement teams specify, order, and validate CNC machined prototypes more confidently.
What You Will Get From This Guide
By reading this document, you will learn:
The exact steps to prepare a design for CNC prototype machining
How to select the optimal material for your specific testing requirements
Standard tolerances you can expect and how to specify them correctly
Common design pitfalls that cause machining failures and how to avoid them
A complete checklist for validating your finished prototype
The Core Process: How CNC Prototype Machining Works
CNC (Computer Numerical Control) prototype machining uses automated cutting tools to remove material from a solid block—called a workpiece—based on your 3D CAD model. The machine follows programmed toolpaths to create your part with typical precision between ±0.025mm and ±0.125mm, depending on the material and geometry.
The standard workflow consists of five sequential steps:
Step 1: CAD Model Preparation – Create a complete 3D solid model in STEP, IGES, or native format. The model must include all features, threads, and surface finishes.
Step 2: Material Selection – Choose from over 50 engineering-grade materials including aluminum 6061, 7075, brass, copper, steel alloys (1018, 4140, 304 stainless), and engineering plastics (ABS, polycarbonate, PEEK, acetal).
Step 3: Programming – Convert the CAD model into machine-readable G-code, defining toolpaths, cutting speeds, and feed rates.
Step 4: Machining – The CNC machine executes the program, typically requiring 1 to 5 business days for standard prototype quantities (1 to 10 pieces).
Step 5: Post-Processing – Apply necessary finishes including deburring, anodizing, bead blasting, powder coating, or heat treatment.
Critical Design Requirements for CNC Prototypes
Minimum Feature Sizes
| Feature Type | Minimum Size | Recommended Size |
|---|---|---|
| Hole diameter | 0.5mm (0.020″) | 1.0mm or larger |
| Wall thickness | 0.5mm (0.020″) | 0.8mm or larger |
| Slot width | 0.8mm (0.031″) | 1.2mm or larger |
| Internal corner radius | 0.4mm (0.016″) | 0.8mm or larger |
Tolerances You Can Expect
Standard CNC machining holds the following tolerances for prototype quantities (1-10 pieces):
Linear dimensions: ±0.125mm (±0.005″) for metals, ±0.25mm (±0.010″) for plastics
Hole diameters: ±0.05mm (±0.002″)
Flatness: 0.05mm per 25mm (0.002″ per inch)
Concentricity: 0.05mm TIR (Total Indicator Reading)
For tighter requirements, specify precision tolerances: ±0.025mm (±0.001″) for metals, which adds approximately 30-50% to machining time and cost.
Material Selection Guide for Prototypes
Selecting the correct material ensures your prototype accurately represents production part performance. Below are the most common choices with their key properties:
Aluminum 6061 – Most popular prototyping metal. Offers excellent machinability, good strength-to-weight ratio, and accepts anodizing. Recommended for structural components, enclosures, and brackets.
Aluminum 7075 – Higher strength than 6061, comparable to some steels. Used for high-stress aerospace and competitive sports equipment prototypes.
304 Stainless Steel – Provides excellent corrosion resistance and good machinability. Ideal for medical device components, food processing equipment, and outdoor hardware.
ABS – Low-cost engineering plastic with good impact resistance. Machines easily but has lower heat resistance than PEEK or polycarbonate.
PEEK – High-performance thermoplastic for demanding applications. Withstands temperatures up to 250°C and resists chemicals. Used in medical implants and aerospace components.
Acetal (Delrin) – Excellent dimensional stability and low friction. Preferred for gears, bearings, and moving mechanical assemblies.
Surface Finish Options for CNC Prototypes
Standard machined finish (Ra 1.6-3.2μm) is suitable for most functional prototypes. For specific requirements, specify one of these post-processing options:
Bead blasting (Ra 0.8-1.6μm) – Uniform matte finish, removes tool marks, prepares surface for anodizing
Media tumbling – Rounds sharp edges, suitable for high-volume cosmetic parts
Type II anodizing – Adds wear-resistant coating, available in clear or black (aluminum only)
Type III hard anodizing – Thicker, harder coating for wear surfaces (aluminum only)
Powder coating – Durable colored finish, minimum thickness 50-100μm
Passivation – Removes free iron from stainless steel surfaces
Common Prototype Failures and Prevention Strategies
Based on real-world production data, these five issues cause over 80% of CNC prototype delays and rejections:
Issue 1: Thin Walls That Warp or Break
A product design engineer recently specified a 0.4mm wall thickness for a polycarbonate electronics housing prototype. During machining, the wall deflected 0.3mm, making the part unusable. The corrected design increased walls to 0.8mm, which machined successfully in the second attempt.
Prevention: Maintain minimum wall thickness of 0.8mm for plastics, 0.5mm for metals. For tall features, add gussets or increase wall thickness proportionally to height.
Issue 2: Sharp Internal Corners
A medical device prototype required a square internal pocket. The designer created a 0.1mm corner radius, which no standard end mill could produce. After consulting with the machinist, the radius was increased to 0.8mm, allowing a standard 1.6mm diameter tool to complete the feature.
Prevention: Design internal corners with radii at least 1.0mm. For true square corners, specify EDM (Electrical Discharge Machining) instead of CNC milling.
Issue 3: Threads in Hard Materials
A stainless steel 304 prototype required M2 threads (2mm diameter). The tap broke inside the part during production, scrapping the entire workpiece. The solution was redesigning to M3 threads or using threaded inserts.
Prevention: Minimum thread size for steel is M3 (3mm) or #4-40 imperial. For smaller threads, use plastic materials or specify thread-forming inserts.
Issue 4: Missing Draft Angles
A deep pocket in an aluminum prototype had vertical walls. The end mill left visible tool marks and required extensive hand finishing. Adding a 1-degree draft angle eliminated the issue.
Prevention: Add 0.5 to 2 degrees of draft to any feature deeper than 10mm (0.4″).
Issue 5: Incorrect Material Specification
A functional test prototype specified standard ABS when the final production part used glass-filled ABS. The prototype passed initial tests but failed under thermal cycling because the glass-filled version had 40% lower thermal expansion. Re-machining in the correct material resolved the discrepancy.
Prevention: Match your prototype material exactly to the production material specification, including filler content and any heat treatment requirements.
Cost and Lead Time Benchmarks
For a typical CNC machined prototype measuring 50mm x 50mm x 25mm (2″ x 2″ x 1″) with moderate complexity:
| Material | Setup Cost | Per-Part Cost | Lead Time |
|---|---|---|---|
| Aluminum 6061 | $150-250 | $30-60 | 3-5 days |
| ABS plastic | $150-250 | $25-50 | 3-5 days |
| 304 Stainless | $200-350 | $50-100 | 5-7 days |
| PEEK | $200-350 | $80-150 | 5-7 days |
These estimates assume standard tolerances, no secondary operations, and domestic production. Expedited service (1-3 days) typically adds 50-100% to setup costs.
Complete Prototype Validation Checklist
Before approving your CNC prototype for production use, verify each of these items:
Dimensional Verification
[ ] All critical dimensions measured with calibrated tools
[ ] Hole sizes and positions confirmed against CAD model
[ ] Flatness and perpendicularity checked on mounting surfaces
[ ] Thread gauges confirm proper fit for any tapped holes
Material Verification
[ ] Material certification matches specification (if required)
[ ] Surface hardness confirmed for wear components
[ ] Heat treatment documentation reviewed
Visual Inspection
[ ] No visible tool marks on functional surfaces
[ ] Sharp edges broken as specified
[ ] Surface finish matches requirements
[ ] No burrs in threads or critical bores
Functional Testing
[ ] Assembly fits with mating components
[ ] Moving parts operate without binding
[ ] Seal surfaces achieve required compression
[ ] Electrical conductivity verified (if applicable)
Key Takeaways for Successful CNC Prototypes
To maximize your chances of receiving a usable prototype on the first attempt, follow these three core principles:
First, design for manufacturability from the start. Apply the minimum feature sizes, draft angles, and corner radii listed in this guide before exporting your CAD model. This eliminates the most common reasons for rejection.
Second, communicate with your machinist before finalizing the design. Share the 3D model and request a design review. Experienced machinists will identify problematic features that CAD software cannot detect automatically.
Third, specify tolerances only where required. Using the standard ±0.125mm tolerance on all dimensions reduces cost and lead time significantly. Reserve precision tolerances for critical interfaces like bearing fits and alignment features.
Action Recommendations
Before sending your prototype for quotation, review the design against the minimum feature size table and the common failure cases mentioned above. If any wall thickness, hole size, slot width, internal radius, or thread detail is below the recommended value, revise the model first. This helps avoid machining difficulty, unstable dimensions, or poor assembly fit later.
If the part is already in production and has shown cracking, distortion, assembly interference, or tolerance problems, request a focused design review around the five common issues in this guide. At YPMFG, these details are also checked early in CNC prototype machining projects so risks can be found at the prototype stage instead of during production.
By following these specifications and design practices, you are more likely to receive CNC machined prototypes that match the final production part, perform as intended, and move smoothly into manufacturing.