1. Introduction: The Silent Sculptor
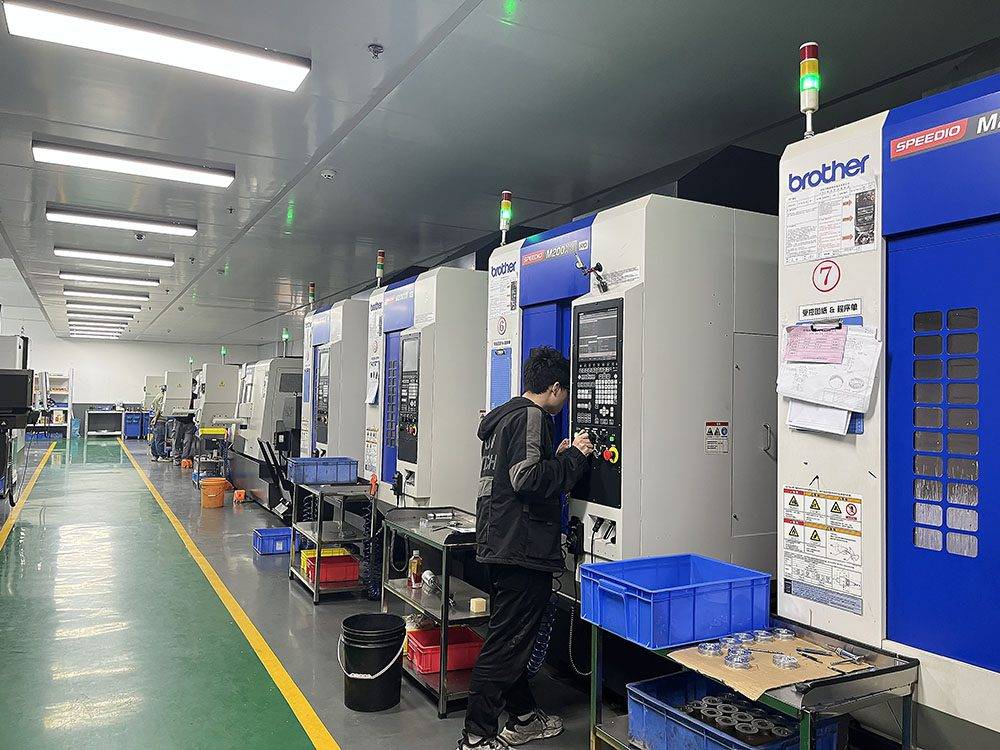
You step into a workshop, and the air smells faintly of coolant. There are several huge machines standing quietly. They are the backbone of modern manufacturing industry – CNC machine tools. They do not rely on direct human control like traditional machine tools, but act according to the instructions of the code to create precise parts from metal blanks. For those who are just getting started, CNC machine operations may seem like an advanced skill. But please feel free to understand its principles and you will be able to communicate with this silent sculptor. Here we will take you to analyze the core steps, build awareness through common cases, and present you with a clear path of action.
2. Understand the premise: safety is the first language
Before starting any operation, you must first establish a knowledge that the machine is honest and will not lie. It will only execute according to the instructions you give. Wrong instructions will inevitably lead to wrong results. Therefore, safety is by no means an empty slogan, but the starting point of operational logic.
For personal protective equipment, it includes goggles, earplugs, and anti-smash shoes. They are not constraints, but an extension of your body.
Every day before starting the machine, check the machine, check the coolant level, check the air pressure, and check the tool clamping condition. This can reflect professionalism, just like a soldier cleaning his firearm.
For program verification, it is necessary to never run the program directly, but to use the "single block execution" and "dry run" modes without confirming the tool path, and let the machine go through the process without cutting load.
In one case, a novice operator skipped the dry run step because he was eager to complete the order. The final result was that there was a G00 rapid positioning instruction that was incorrectly written due to offset in the coordinates. This instruction directly drove the tool, causing it to hit the workpiece fixture at a feed rate of 100%, causing damage to the spindle and requiring up to three days of repair time. The lesson for this common situation is that the machine doesn’t understand concepts like “probably” or “maybe,” it just follows unerring logic.
<Keywords: Safety Regulations Verification> – Simulate before execution and make sure everything is correct before cutting.
3. Workpiece and tool: a firm handshake
The most critical point in controlling CNC machine tools is to establish a stable and reliable physical connection. This covers two things: one is the clamping operation of the workpiece, and the other is the installation of the tool.
If the workpiece is displaced during the cutting process, all dimensions will become illusory. For scholars who are just starting out in the industry, the most common example is to use a bench vise to clamp a square blank. Please ensure that:
1. The bottom of the workpiece is supported by a height block to prevent the clamping from tilting.
2. The jaws have been cleaned and no iron filings remain.
3. The locking force is moderate. If it is too small, the workpiece will slide; if it is too large, the thin-walled part may be deformed.
A cutting tool is a pen that communicates directly with the material. When installing a milling cutter or drill bit, you must press the tool handle directly into the innermost position of the clamp and then use a torque wrench to tighten it. A common mistake is that the tool extends too long, causing a particularly strong vibration during cutting. This will not only affect the smoothness of the surface, but may also cause the tool to break.
Q/A: How to judge whether the tool clamping is firm?
1. A: Use a wrench that uses torque to tighten according to the torque specified in the standard. Visually inspect the contact surfaces of the tool holder and chuck. 2. Make sure there are no gaps and can rotate concentrically.
4. Coordinate system: machine’s sense of space
The machine must know "where zero is". The key to CNC machine tool operation is to define three extremely important coordinate systems.
The machine tool coordinate system is determined by the travel limit switch. It is also the reference object that the machine has from the beginning. The operator cannot change it, but it must be understood.
In the workpiece coordinate system, you tell the machine to start processing from this corner of the workpiece. This is set with the help of G54 to G59 instructions. A common method is to use an edge finder to touch the left and front of the workpiece and record the coordinate values.
In terms of tool length compensation, the length of each tool is not the same. You have to use a tool setter to measure the length difference of each tool compared to the reference tool, and then enter it into the tool compensation table.
Analogical reasoning is like inviting a friend to your home. The machine tool coordinate system is the "earth's latitude and longitude", the workpiece coordinate system is the "community where your home is located", and the tool compensation is "the friend's height – to make it clear whether he or she needs to bow his head when entering the door."
This is a situation shown by experimental evidence. More than 60% of beginners' first products are scrapped, and the root cause is an error in the coordinate system setting. For example, the Z value of G54 is set to 5mm above the top surface of the workpiece, but the length difference in tool compensation is forgotten, resulting in the first knife cutting too deep into the workpiece. To repeat the core point, the coordinate system is a quantitative spatial logic. Every time you set zero, you should be as rigorous as a sniper calibrating a scope.
5. Program Execution: From Code to Action
The sequence of commands constitutes a program. A typical CNC program segment such as "G01
For starters, the execution program should adopt a layered and progressive strategy:
> Step One: Graphical Simulation
On the computer side, or in the simulation software built into the controller, observe the tool path in the form of three-dimensional rendering. At this time, you can find logical errors such as "Will the tool hit the fixture?" "Whether the cutting point is inside the workpiece?"
> Step 2: Dry run
Adjust the "override switch" of the machine tool to 0% as required, and then start the program. At this time, the machine will run through all coordinates, but the spindle will not rotate and the tool will not cut. You need to place your hand on the "Feed Hold" button and monitor the entire process.
> Step Three: Single Section Execution and First Piece Trial Cutting
When cutting real materials for the first time, the "single block execution" mode needs to be used. Each time the "Cycle Start" button is pressed, the machine will only execute one line of the program. At the same time, the feed rate must be adjusted to 50%. After cutting a short section of material, pause and measure its size. Wait until it is confirmed that there are no errors, and then continue the cutting operation.
During the trial cutting process, you need to listen carefully to the sound produced by the spindle load. The cutting sound under steady conditions is like a stream, but if there is a sharp vibration sound, it means that it is necessary to reduce the depth of cut or adjust the speed.
Q/A: How to safely resume the program after it is stopped midway?
A: Manually lift the tool to the safety surface. Check the starting point coordinates of the remaining blocks. Use the "block skip" or "specified line start" functions to prevent repeated cutting.
6. Quality inspection and common problem diagnosis
When the cutting operation ends, the workpiece has not been completed. Quality verification is the last step in the closed-loop process. Please pick up those measuring tools: there are vernier calipers, micrometers, and inside diameter dial indicators.
There are two opposing arguments for comparison, "feelings based on experience" and "data-based measurements". They are at completely different levels. The feelings based on experience will often express "it feels about the same", but using data-based measurements will tell you that "the deviation has reached 0.02mm, which is beyond the tolerance range", so you must trust the data instead of just relying on intuition.
The key is to measure the key dimensions before removing the workpiece. If you find any deviation in size, you need to calmly trace the source.
1. Are the tools worn? Observe the cutting edge. If the cutting edge appears whitish or chipped, then the tool needs to be updated and the tool setting operation must be performed again.
2. Is the workpiece loose? Check the clamping marks. If there are signs of displacement, review the clamping plan.
3. What happens when thermal deformation occurs? This is because continuous processing causes the temperature of the workpiece to gradually become higher, causing it to expand. After that, wait until it cools to room temperature before measuring.
The suggestion given by the action is: build a simple "first article inspection record sheet". Record the program number, record the tool number, record the tool setting value, record the measured dimensions and the operator's signature. This record belongs to your process evidence and is also a valuable case database for optimizing CNC machine operations in the future.
7. Conclusion: Co-evolution with machines
Examine the journey we have gone through: starting from safety verification, to clamping logic, coordinate definition, to the actual operation of the program and the closed loop of quality. In this case, you know that the operation of CNC machine tools is not a magical spell, but a logical structure that is rigorous and can appear repeatedly. Let’s emphasize the core idea: for any accurate part, what starts the process of its creation is a clear and logically consistent cognition in the operator’s mind.
We once again emphasize the "experience" and "authority" in the EEAT principles. You don’t need to grow into a genius, but you must transform into a cautious and rigorous record-keeper and a patient verifier. Every mistake under common circumstances is a free experimental lesson, which can directly tell you exactly where the boundaries of the system are set.
Take action now:
1. Start a review immediately and recall the entire process of your previous operation. Which step is most likely to contain risks?
2. Build a checklist. Create your own personal safety and operational checklist, print it out, and post it next to the machine.
3. Slower is actually faster: When debugging the program next time, it is right to purposely treat "dry run" and "single section execution" as insurmountable links.
What is patient is the machine, which reproduces the same trajectory over and over again without regrets or resentment. And as the person who gives it that set of logic, you will definitely be able to find the peace and power of creation in such a rigorous communication scene. Go and practice it yourself, that silent partner in the workshop is waiting for your next guidance!
Q/A: What is the fastest way to optimize CNC operation?
A: Systematically record the causes of each alarm and dimensional deviation, and build a personal fault case library to prevent repeated errors.