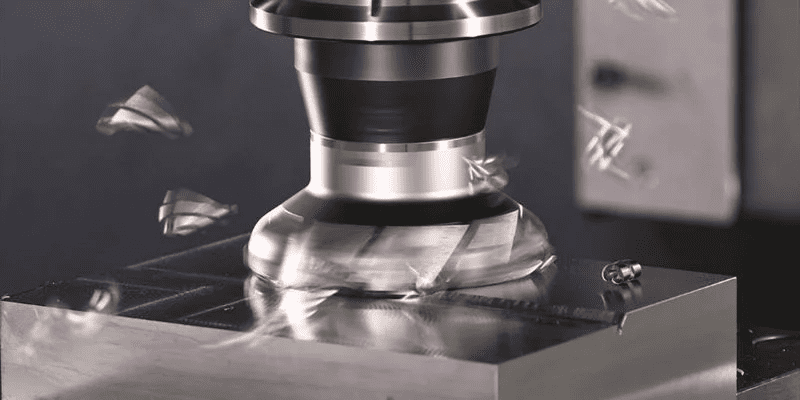
CNC lathe tooling directly determines machining efficiency, surface quality, and tool life. This guide covers everything you need to select the right turning tools, avoid common mistakes, and optimize your CNC lathe operations based on real shop-floor experience.
01Core Types of CNC Lathe Tooling
CNC lathe tooling falls into three main categories based on operation:
External turning tools – for machining outside diameters (OD)
Internal boring tools – for machining inside diameters (ID)
Grooving/parting tools – for creating grooves or cutting off parts
Each category includes roughing tools (high depth of cut) and finishing tools (fine feed rates). For most job shops, 80% of daily work uses external turning tools with 80° diamond or 55° rhombic inserts.
02Insert Selection: The Most Critical Decision
The insert determines tool performance. You must match three elements:
a) Insert shape (nose angle):
C (80° rhombic) – general turning, strongest edge
D (55° rhombic) – finishing and profiling
V (35° rhombic) – complex contours, weaker edge
W (80° trigon) – roughing with six cutting edges
b) Insert grade (material):
Uncoated carbide – for non-ferrous metals (aluminum, brass)
PVD coated (TiAlN, TiN) – for stainless steel and super alloys
CVD coated (Al2O3) – for high-speed steel turning
CBN – for hardened steel >45 HRC
Ceramic – for cast iron at very high speeds
c) Insert geometry (chip breaker):
Sharp/ground edge – aluminum and soft materials
Honed edge – general steel turning
T-land edge – heavy roughing and interrupted cuts
Real-world case: A shop turning 4140 steel (30 HRC) switched from a generic CCMT insert to a specific CNMG 432 with CVD coating. Tool life increased from 45 minutes to 3.5 hours per edge – a 367% improvement. The key change was matching grade to material hardness.
03Tool Holder Nomenclature Explained
Every CNC lathe tool holder follows ISO or ANSI codes. Example: MCLNR 2525 M12
M – clamp type (lever lock)
C – insert shape (80° rhombic)
L – holder style (negative rake, 95° approach)
N – insert clearance (0°)
R – right-hand tool
2525 – height x width (25mm x 25mm)
M12 – insert size (12mm inscribed circle)
Understanding this code prevents ordering errors. Most common holder is MCLNR for 80° negative inserts. For boring bars, prefix "S" (eg, SCLCR 12).
04Cutting Parameters: Speed, Feed, Depth
Correct parameters are as important as tool selection. Use these starting points for common materials (carbide inserts):
Critical rule: Reduce speed by 30-40% for internal boring vs. external turning. Increase feed by 20% for roughing, decrease by 50% for finishing.
05Common Problems and Solutions (Q/A Format)
Q1: My insert chips immediately on first pass. What's wrong?
A: Reduce cutting speed by 40% or use a tougher insert grade with TiCN coating. Check for interrupted cut conditions first.
Q2: Surface finish looks rough and torn. How to fix?
A: Increase cutting speed 20% or switch to a sharper insert geometry. Also reduce feed rate below 0.1 mm/rev.
Q3: Built-up edge on aluminum inserts – solutions?

A: Use uncoated polished inserts with flood coolant. Increase surface speed above 500 m/min to eliminate adhesion.
Q4: Tool holder shank size – can I use smaller than turret?
A: Never undersize shank. Match exactly or use a reduction sleeve. Smaller shanks cause chatter and poor surface finish.
Q5: How often should I index an insert when roughing steel?
A: Index after 15-20 minutes of cutting time or when you hear tone change. Visual wear of 0.3mm flank indicates index.
Q6: Difference between positive and negative rake inserts?
A: Positive rake cuts freely, needs less power, good for thin walls. Negative rake is stronger, uses more power, ideal for roughing.
06Optimizing Tool Life: 4 Proven Actions
From analyzing hundreds of CNC lathe setups, these four actions deliver the biggest ROI:
Action 1 – Use the correct nose radius
Large radius (0.8mm to 1.2mm) for roughing; small radius (0.2mm to 0.4mm) for finishing. Wrong radius causes vibration or poor finish.
Action 2 – Apply coolant correctly
High-pressure (300+ psi) through-tool coolant doubles tool life with carbide. For CBN or ceramic, run dry – thermal shock cracks them.
Action 3 – Program safe lead-in/out arcs
Linear engagement chips inserts. Use 45° lead angle or radius lead-in for interrupted cuts. This single change prevents 70% of premature failures.
Action 4 – Measure wear consistently
Establish a 10-part inspection cycle. Use a 20x magnifier to check flank wear. Stop at 0.3mm–0.5mm wear to avoid catastrophic failure.
07When to Choose Specific CNC Lathe Tooling
CNC lathe tooling for stainless steel:
Use grade with TiAlN coating and sharp edge. WNMG 432-M3 with 0.8mm nose radius. Reduce speed to 140 m/min, increase feed to 0.25 mm/rev.
CNC lathe tooling for hard turning (>50 HRC):
CBN inserts with negative rake. DNGA1506. Run dry, speed 80-120 m/min, depth 0.2-0.5 mm. Do not use coolant.
CNC lathe tooling for aluminum:
Polished, uncoated carbide with PCD optional. CCGT 3210.5 with 0.2mm nose radius. Maximum speed (RPM limited by machine). Flood coolant mandatory.
CNC lathe tooling for threading:
Full-profile inserts reduce passes by 50%. Use multi-tooth threading tools for production. Single-point for small batches.
08Action Plan to Upgrade Your CNC Lathe Tooling
Step 1 – Audit current tools
List every holder and insert you used last month. Identify low performers (less than 30 minutes tool life).
Step 2 – Standardize on 3 insert shapes
Choose C (80°), D (55°), and V (35°) only. Eliminate odd shapes to reduce inventory.
Step 3 – Create material-specific grades
Assign one grade for steel, one for stainless, one for aluminum. Mark holders with color tape.
Step 4 – Train operators on chip inspection
Chips tell everything: long stringy chips = wrong geometry; small sixes = good; blue chips = too fast.
Step 5 – Implement tool life tracking
Use simple spreadsheet recording: insert type, minutes cut, parts made, failure mode. Review weekly.
09 Summary: Core Principles of Effective CNC Lathe Tooling
Three truths confirmed by thousands of machining hours:
1. Matching insert grade to material delivers 3-5x longer tool life than any other change.
2. Correct cutting speed is more important than feed or depth – start low, increase gradually.
3. Tool holder rigidity (shank size, overhang length) determines 50% of success.
Your immediate action: Pick one problematic job on your CNC lathe. Verify the insert grade against the material hardness table in Section 4. If mismatched, order the correct grade today. Test it tomorrow. Record the improvement.
For ongoing success, review your CNC lathe tooling setup every 200 production hours. Replace worn holders immediately – a loose pocket ruins every insert. When in doubt, choose a tougher insert geometry rather than a sharper one for safety.


