Hardware stamping parts are metal components produced through a cold-forming process that uses dies and presses to shape sheet metal into precise forms. This guide explains what hardware stamping parts are,how they are manufactured, their common applications, and key quality considerations—helping you make informed sourcing and design decisions.
01What Are Hardware Stamping Parts?
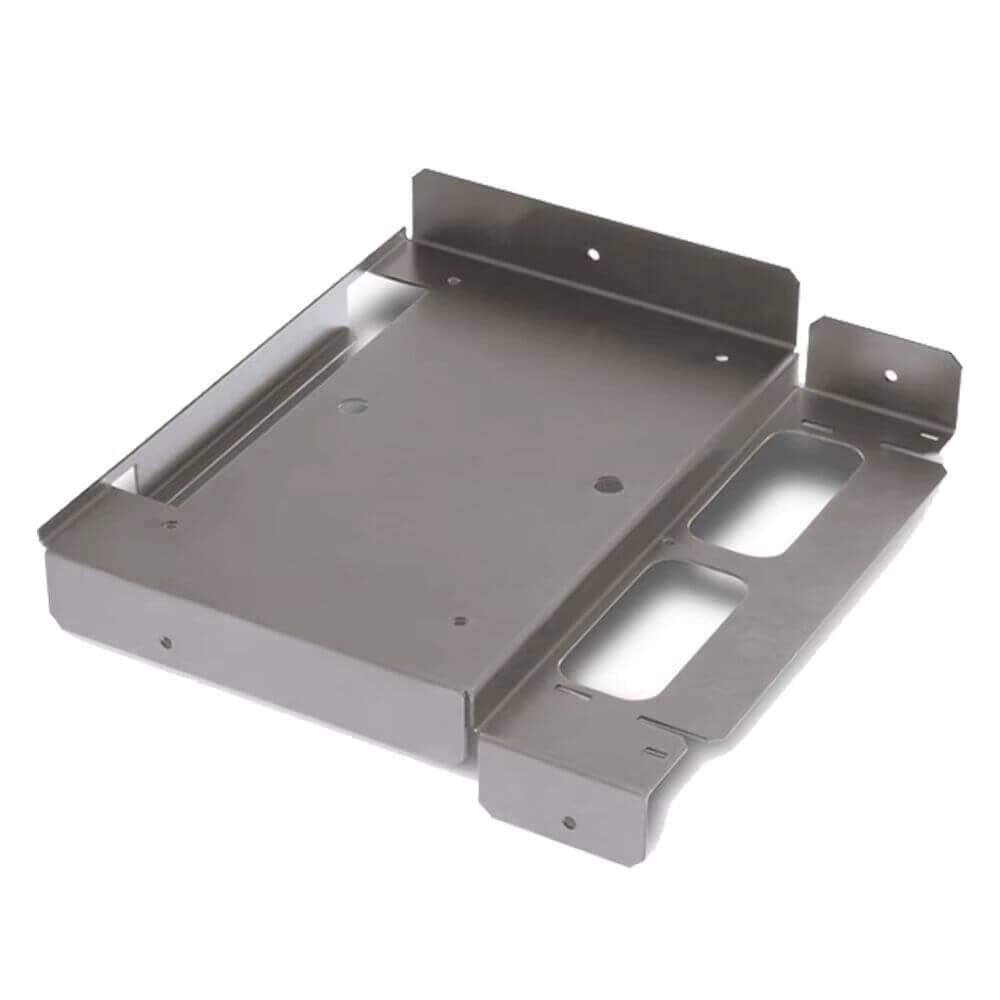
Hardware stamping parts refer to metal components created by placing flat metal sheets or coils into a stamping press, where a tool and die surface shape the metal into the desired form. The process typically involves operations such as blanking, punching, bending, coining, and embossing. Stamped parts range from simple brackets and clips to complex automotive body panels and electronic shielding cases.
02The Stamping Process: Step by Step
1. Material Preparation – Metal coils (steel, aluminum, copper, brass, or stainless steel) are fed into the press.
2. Die Design and Fabrication – Custom dies are machined to exact part specifications. Progressive dies perform multiple operations in sequence.
3. Stamping Operation – The press applies high force (typically 20 to 6,000 tons) to shear, bend, or form the metal.
4. Secondary Finishing – Deburring, heat treatment, plating, painting, or anodizing may follow to meet surface and durability requirements.
Common example: A manufacturer producing computer chassis panels uses progressive stamping to punch ventilation holes, form mounting tabs, and cut the final outline in one continuous stroke.
03Materials Used for Hardware Stamping Parts
04Key Advantages of Hardware Stamping
High precision – Tolerances as tight as ±0.005 inches achievable.
Repeatability – Thousands of identical parts from one die.
Cost-efficiency for volume – Per-unit cost drops significantly above 5,000–10,000 pieces.
Material savings – Nesting optimizes sheet usage, reducing scrap.
Strength enhancement – Work hardening during cold forming improves mechanical properties.
05Common Applications (Real-World Cases)
Case 1 – Automotive industry: A car manufacturer needed 50,000 engine mounting brackets per month. Using progressive stamping with 0.12-inch thick hot-rolled steel, they achieved consistent hole alignment and bend angles, eliminating secondary drilling.
Case 2 – Consumer electronics: A laptop producer required EMI shielding covers. Stamping from 0.020-inch phosphor bronze provided both electrical conductivity and precise snap-fit features, reducing assembly time by 30%.
Case 3 – Construction hardware: A supplier of door hinges switched from machining to stamping. The result: 80% lower cost per hinge and 5x faster production while maintaining load rating of 200 lbs per hinge.
06Quality Control and Industry Standards
Reliable hardware stamping parts must meet recognized standards. Always verify:
Dimensional accuracy – Check against ISO 2768-m or customer drawing tolerances.
Material certification – Mill test reports per ASTM/EN/JIS specifications.
Burr height – Typically ≤10% of material thickness for safety-critical parts.
Surface finish – No cracks, excessive scratches, or roll marks.
Common industry specifications include:
ISO 9001:2015 for quality management systems.
IATF 16949 for automotive stamping.
IPC-A-610 for electronic hardware stampings.
07Common Problems and Solutions
08How to Select a Hardware Stamping Supplier
When sourcing stamped parts, follow this checklist:
1. Review their die-making capability – In-house tooling reduces lead time and cost.
2. Ask for a capability matrix – Maximum press tonnage, bed size, and feeding length.
3. Request a first-article inspection report – Verifies dimensional compliance.
4. Check secondary process integration – Plating, heat treating, or assembly under one roof.
5. Audit their quality system – Look for IATF 16949 or ISO 13485 for medical applications.
09Actionable Recommendations
For prototyping (1–500 pieces): Consider laser cutting or CNC punching instead of hard tooling to avoid die costs.
For medium volumes (500–10,000 pieces): Use single-station or transfer dies.
For high volumes (>10,000 pieces): Invest in progressive dies for lowest per-unit cost.
Always provide a 2D drawing with GD&T (geometric dimensioning and tolerancing) to define critical features.
Include a material specification – For example, “ASTM A1008 CS Type B, 1.0 mm thick.”
10Conclusion
Hardware stamping parts offer unmatched precision, speed, and cost efficiency for high-volume metal components. The core takeaway: match the stamping method (progressive, transfer, or compound) to your volume and complexity needs. Always validate die design with simulation software, and require first-article inspection from your supplier. By following the material selection and quality guidelines above, you can achieve reliable, repeatable stamped parts that meet engineering specifications while controlling manufacturing costs.
For your next project, start by calculating annual quantity, reviewing material formability, and requesting stamped samples before full production. This ensures your hardware stamping parts perform exactly as designed.