CNC prototyping is the fastest way to turn a digital design into a physical, functional part for testing. This guide gives you the complete, step‑by‑step process to get a high‑quality CNC prototype—without wasting time or money on common mistakes.
01What You Will Learn in 10 Seconds (The Core Takeaway)
To succeed with a CNC prototype:
1. Design for the basic machining rules (avoid thin walls, deep pockets, sharp internal corners).
2. Choose the right material (aluminum 6061 for strength, ABS for low‑cost plastic).
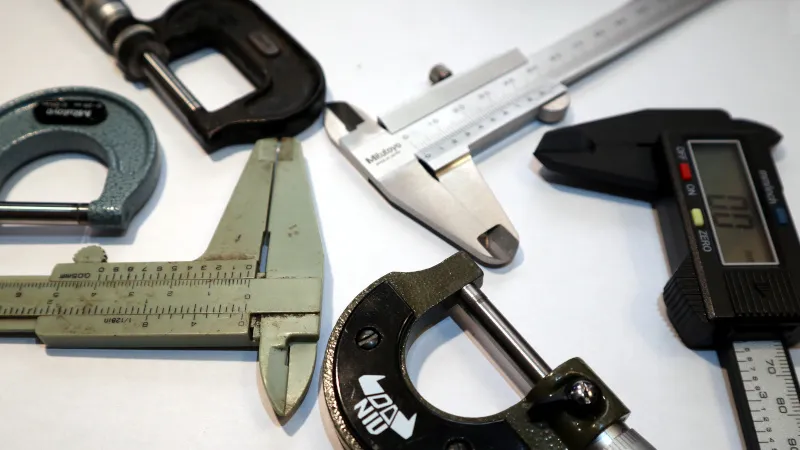
3. Set tolerances realistically (±0.1 mm for most fit checks, ±0.05 mm only where needed).
4. Add a standard surface finish (as‑machined is fine; bead blast or anodize for look/feel).
Do these four things, and your first CNC prototype will work for assembly and functional testing 95% of the time.
02What Is a CNC Prototype and Why It Matters
A CNC prototype is a part made by a computer‑controlled cutting machine (mill, lathe, or router) directly from a solid block of material. Unlike 3D‑printed prototypes, CNC prototypes use real production materials and tolerances. This means you can test strength, heat resistance, and precise fit long before investing in expensive molds or tooling.
Common real‑world situation: A design team needs to check if a new mounting bracket fits inside an existing assembly. They 3D print a part—it fits perfectly. But the metal CNC prototype cracks under vibration. That failure teaches them to add fillets and increase wall thickness. Without the CNC prototype, they would have ordered 500 injection‑molded parts that all failed.
03The Only 4 Steps You Need to Make a CNC Prototype
Step 1: Prepare Your CAD File
Export as STEP (.stp) or IGES (.igs) – these are the universal CNC formats. Avoid STL for CNC (it has no curvature definition).
Remove all unnecessary internal cavities, lettering, or cosmetic details that do not affect function.
Add a minimum radius of 0.5 mm at internal vertical corners (otherwise an end mill cannot reach).
Step 2: Select Material and Size
Aluminum 6061 – most common for metal prototypes (good strength, easy to machine).
ABS or Delrin (acetal) – for plastic prototypes that need stiffness and low friction.
Brass or 7075 aluminum – for higher strength or wear resistance.
Start with a standard block size: add at least 3 mm extra on each dimension to allow clamping and facing.
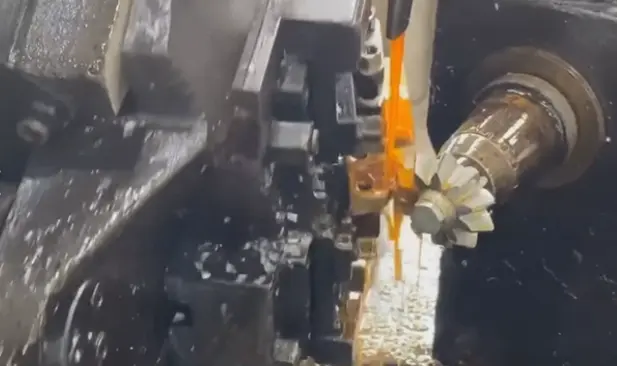
Step 3: Choose Machining Strategy (3‑axis vs 5‑axis)
3‑axis CNC – handles 90% of prototype needs: flat top surfaces, holes, pockets, and simple contours. Cost is lowest.
5‑axis CNC – only needed for undercuts, complex curved surfaces, or parts that cannot be flipped. Increases cost by 2–3x.
Real‑world rule: If you can machine the part by flipping it twice, use 3‑axis.
Step 4: Specify Tolerances and Surface Finish
Use this table for your drawing:
Surface finish options (cost low to high):
As‑machined (visible tool marks, but fine for function) – free.
Media blast (uniform matte finish,hides marks) – +15% cost.
Anodize (Type II, clear) for aluminum – adds wear and corrosion resistance – +25% cost.
Do not add cosmetic finishes (polish, color anodize) on a first prototype unless you are testing the finish itself.
04Three Common Prototype CNC Failures and How to Avoid Them
Failure 1: Threads strip or do not fit
Cause: Tapping a hole smaller than M3 in aluminum.
Solution: Use M3 or larger threads in prototypes. For holes under M3, design for a threaded insert or a through hole with a nut.
Example: A handheld device case with M2 screws failed 7 out of 10 times. Changing to M2.5 (still small but stronger) solved it.
Failure 2: Part warps after cutting
Cause: Removing too much material from one side only (thin wall left).
Solution: Rough cut both sides alternately (“rough, flip, rough”) before finishing. Also leave at least 1.5 mm final wall thickness.
Example: A bracket with a 0.8 mm wall came out curved like a banana. Increasing wall to 1.5 mm and adding two small ribs made it straight.
Failure 3: Holes do not align with mating parts

Cause: Drawing used “center‑to‑center” dimensions without datum reference.
Solution: Always dimension holes from two perpendicular edges (datum A and B). Specify hole position tolerance as ±0.1 mm from those edges.
Example: A team had to re‑drill 12 holes by hand because the CAD model used absolute coordinates from an arbitrary zero point. After switching to datum‑based dimensions, every prototype fit first time.
05How Much Does a CNC Prototype Cost? (Real Numbers)
For a single part roughly the size of a smartphone (50 x 50 x 25 mm):
Simple block with 3 holes – $80 to $150
Medium complexity (pockets, 2.5D features) – $200 to $400
Complex (curved surfaces, tight tolerances, 5‑axis) – $500 to $1,200
These are US shop rates as of 2026. You can reduce cost by:
Providing STEP file (no translation errors).
Removing all text engraving (adds programming time).
Accepting as‑machined surface.
Ordering 2 or 3 identical parts at once (setup cost spread).
06Do‑It‑Yourself vs. Using a Professional CNC Service
Actionable advice: For functional prototypes that require precise fit or real metal strength, use a professional service. Buy a desktop CNC only if you make more than 20 simple plastic prototypes per month.
07The Three Most Common Questions (Answered Directly)
Q1: Can I use a CNC prototype for a production part?
Yes, if the quantity is very low (1–10 pieces). Many companies use CNC prototypes as final parts for test fixtures, jigs, or short‑run custom components. However, for 50+ parts, other methods (injection molding, casting) become cheaper per part.
Q2: How do I send a design to a CNC shop without making mistakes?
Follow this checklist before sending:
[ ] File format is STEP (.stp) not STL.
[ ] All dimensions are in either mm or inches (not mixed).
[ ] Minimum internal radius is 0.5 mm (or larger).
[ ] Minimum wall thickness is 0.8 mm for metal, 1.5 mm for plastic.
[ ] Threads are M3 or larger.
[ ] A note says “Remove all sharp edges, break edges 0.2 mm.”
Q3: What is the fastest way to get a CNC prototype?
Same‑day or next‑day service exists in many industrial areas (e.g., around Los Angeles, Chicago, Shenzhen). Search for “rapid CNC prototyping near me” and call to ask for “quick‑turn with no inspection report.” Expect to pay 2x the normal price. For typical 2‑day service, use online platforms that automatically quote and manufacture.
08Repeat of the Core Success Formula
Design for simple machining (no sharp internal corners, no extremely thin walls).
Use standard material and tolerances (6061 aluminum, ±0.1 mm).
Do not add cosmetic finishes on the first prototype.
Order from a professional service unless you run a small machine shop at home.
09Your Action Plan for a First CNC Prototype
1. Open your CAD model.
2. Apply the four design checks (radii, wall thickness, thread size, datum dimensions).
3. Export as STEP file.
4. Go to any online CNC prototyping service (or local shop) and upload the file.
5. Select: Material = 6061 aluminum, Tolerance = ±0.1 mm, Surface = as‑machined.
6. Order one piece first. Test fit and function.
7. Make changes on the CAD model, then order the second version.
Do not wait for perfect design. A real CNC prototype in your hand will teach you more than two weeks of simulation. Order your first prototype today—even a simple test block—to verify your workflow. That single action eliminates 80% of guesswork in your project.