3 axis CNC machining is a subtractive manufacturing process where cutting tools move along three linear axes (X, Y, Z) to shape solid blocks into precision parts. This guide covers its working principles, key advantages, common applications, and selection criteria – giving you the complete, actionable answer you need.
01 How 3 Axis CNC Machining Works
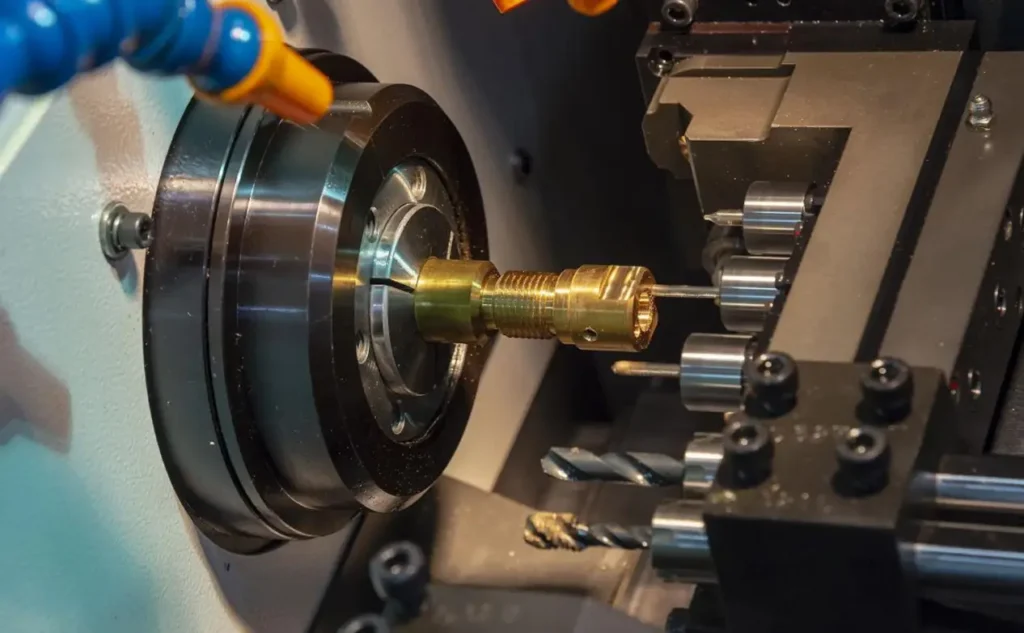
In 3 axis machining, the cutting tool moves left/right (X axis), front/back (Y axis), and up/down (Z axis). The workpiece remains fixed on the machine bed. The tool follows programmed paths to remove material layer by layer. This three‑dimensional movement allows machining of flat surfaces, slots, holes, pockets, and basic contours.
Core components of a 3 axis CNC system:
Machine frame – provides rigidity and vibration damping
Spindle – rotates the cutting tool at speeds from 1,000 to 30,000+ RPM
Drive motors – move each axis via ball screws or linear motors
Controller – executes G‑code instructions to coordinate motion
Tool changer (optional) – swaps tools automatically for multi‑step jobs
The process starts with a CAD model, converted to CAM toolpaths, then G‑code that the machine follows. Typical tolerances range from ±0.001″ to ±0.005″ (0.025–0.127 mm), depending on machine quality and setup.
02 Why Choose 3 Axis Over Other CNC Types?
For thousands of common parts, 3 axis machining delivers the best balance of capability, cost, and speed. Here are the core advantages:
1. Lowest capital investment – A 3 axis machine costs 30‑50% less than a 5 axis system. Small workshops and prototyping shops can start with under $20,000 for a quality entry‑level VMC.
2. Faster setup and programming – Toolpaths are simpler, requiring less CAM expertise. A typical 2.5D part can be programmed in 15‑30 minutes versus 2‑3 hours for multi‑axis.
3. Sufficient for 80% of mechanical parts – Brackets, enclosures, flanges, covers, manifolds, and many structural components require no undercuts or steep angles. 3 axis machines handle these efficiently.
4. Easier fixturing – Workholding is straightforward. Standard vices, clamps, or vacuum tables work without complex tilting fixtures.
5. Wider machine availability – Service, spare parts, and skilled operators are readily available worldwide. Downtime is minimal compared to exotic multi-axis systems.
Real‑world example: A manufacturer producing aluminum heat sinks for LED lights needed 50,000 units per month. Switching from manual milling to 3 axis CNC reduced cycle time from 12 minutes to 2.5 minutes per part, scrap rate dropped from 8% to 1.2%, and labor cost per piece fell by 73%.
03 Common Applications (With Real Case Studies)
3 axis CNC machining serves industries where parts fit within a 3‑sided work envelope. Typical parts include:
Automotive: Engine brackets, throttle bodies, suspension mounts, sensor housings. A common situation: a racing team needed 20 custom intake manifold spacers. Using 3 axis machining allowed same‑day design changes and 24‑hour delivery at 1/5th the cost of casting.
Aerospace: Non‑critical brackets, panel supports, test fixtures. A repair station machined replacement seat rail brackets for a vintage aircraft – 3 axis equipment produced the required ±0.003″ accuracy in 4140 steel.
Medical: Instrument handles, enclosure frames, test fixtures. A dental lab used 3 axis CNC to mill surgical drill guides from PEEK plastic. Each guide took 18 minutes, with no secondary finishing needed.
Consumer products: Drone frames, speaker grilles, laptop stands, camera mounts. An electronics startup machined 500 aluminum enclosures for a portable audio interface using a desktop 3 axis mill – unit cost $4.20 versus $18 for injection molding at low volume.
Prototyping and education: Almost any shape that fits within a 6″ cube. Universities widely use 3 axis CNC routers to teach manufacturing fundamentals. Students machine parts from wax, foam, wood, and aluminum safely.
04 Technical Limitations You Must Know
While 3 axis machining is versatile, it cannot machine:
Undercuts – interior recesses wider at the bottom than the opening
Negative draft angles – walls that slope inward
Parts requiring 5‑sided machining without repositioning
Deep ribs with high aspect ratio (over 8:1 without special tools)
For these features, you need indexed (3+2) or full 5 axis machining. Repositioning the workpiece manually adds setup time and tolerance stack‑ups. A typical workaround: design parts with accessible features or split complex parts into multiple components that bolt together.
Precision – this is the first keyword to integrate naturally. Maintaining high precision in 3 axis machining requires rigid fixturing,properly sharpened tools, and calibrated ball screws. A common mistake: using a worn tool that deflects more than 0.002″ – this alone ruins part accuracy. Always verify spindle runout (should be under 0.0005″) and perform a test cut on scrap material first.
05 Cost Breakdown for 3 Axis CNC Machining
Understanding cost drivers helps you optimize part design and supplier selection. Typical pricing for job shop work (2026 US market):
Material cost adders:
Aluminum 6061: baseline (1.0x)
Mild steel: 1.2x (slower feeds, more tool wear)
Stainless steel 304: 2.5x (requires rigid setup and coated tools)
Brass: 0.9x (machines easily but material cost higher than aluminum)
Plastics (Delrin, PEEK): 1.5‑3.0x depending on thermal stability needs
Hidden costs to ask about:
Deburring and edge breaks ($0.50‑2.00 per part)
Surface finishing (anodizing adds $1‑5 per part minimum)
Inspection reports (CMM measurement $50‑150 per setup)
Packaging for shipment (bulk vs. individual foam trays)
Real case: A startup needed 200 precision bushings from 12L14 steel. One shop quoted $18 each with 2‑week lead time. Another shop optimized the toolpath and reduced cycle time by 40% – final price $11.50 each with 1‑week delivery. The difference was the second shop's experience with 3 axis high‑efficiency milling strategies.
06 How to Select a 3 Axis CNC Machining Service
Follow these six steps to find a reliable partner:
Step 1 – Verify machine capabilities. Ask for the machine make, model, max spindle speed, and travel (X/Y/Z). A machine with 10,000+ RPM and 20″x16″x20″ travel covers most small to medium parts.
Step 2 – Check tolerance claims. Any shop claiming ±0.0005″ on a standard 3 axis mill without climate control is exaggerating. Realistic economic tolerance is ±0.005″ for aluminum, ±0.003″ for steel. Tighter tolerances increase cost exponentially.
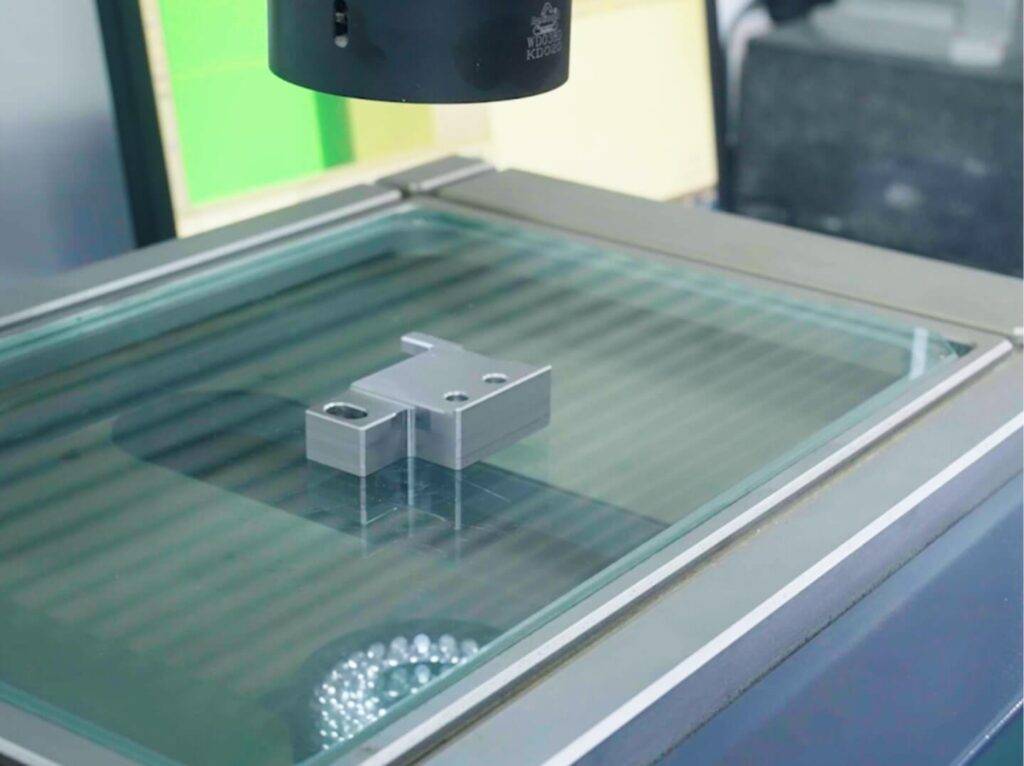
Step 3 – Ask for a sample part. Send them a simple test piece (eg, a 2″ square block with a hole, slot, and pocket). Compare surface finish, edge sharpness, and dimensional accuracy. A good shop returns the part within 3 business days.
Step 4 – Review their CAM workflow. Shops using modern CAM (Autodesk Fusion, Mastercam, SolidCAM) produce more reliable toolpaths. Ask if they simulate the toolpath before cutting – this prevents crashes and broken tools.
Step 5 – Request material certifications. For critical parts, ensure they can provide mill certificates and traceability. Aerospace and medical applications require this documentation.
Step 6 – Compare lead time vs. price. Standard lead time for 3 axis machining is 5‑10 business days for low volume. Expediting (2‑3 days) adds 30‑50% premium. Avoid shops promising “1 day” without a surcharge – they likely outsource or rush quality.
07 Common Questions About 3 Axis CNC Machining (Q/A)
Q: Can 3 axis machine 3D curved surfaces like a sphere?
A: Yes, with ball end mills and fine stepovers (0.005″), but finish will show scallops requiring manual polishing for smooth optical surfaces.
Q: What is the maximum part size for typical 3 axis machining?
A: Standard mills handle up to 40″ x 20″ x 20″. Larger parts require gantry routers or 5 axis machines.
Q: How much does a 3 axis CNC machine cost to buy?
A: Desktop units $5,000‑15,000, hobby mills $15,000‑30,000, production VMCs $35,000‑100,000, plus tooling ($2,000‑10,000).
Q: Does 3 axis machining work for hard metals like titanium?
A: Yes, but use rigid setups, carbide tools, coolant flood, and reduce depth of cut to 0.010‑0.020″ per pass.
Q: How do I reduce machining time for high volumes?
A: Optimize toolpaths with trochoidal milling, use high‑feed cutters, and add a fourth axis indexer for multi‑side parts without refixturing.
08 Efficiency – Second Keyword Integration
Efficiency in 3 axis machining directly impacts your bottom line. To maximize efficiency:
Use high‑speed machining (HSM) toolpaths that maintain constant tool engagement – this reduces cycle time by 30‑60% compared to conventional paths.
Implement tool life monitoring – change end mills after 60‑90 minutes of cutting aluminum to avoid gradual wear that ruins surface finish.
Standardize workholding – dedicate a vise or fixture plate to your most common part sizes. A machinist can reduce setup time from 25 minutes to 8 minutes with a modular fixture system.
Batch similar parts together – running five different brackets in one setup saves three separate changeovers. Real data: a job shop cut average lead time from 6 days to 3 days by batching.
A common case: A contract manufacturer machining 2000 identical pump housings per month reduced cycle time from 14.2 minutes to 8.7 minutes by switching from a 3‑flute to a 5‑flute end mill and increasing feed rate from 80 IPM to 140 IPM. Annual savings exceeded $47,000.
09 Actionable Conclusion – Repeat the Core Point
Core point to remember: 3 axis CNC machining is the most practical, cost‑effective solution for the vast majority of mechanical parts – brackets, enclosures, covers, flanges, and prototypes. It handles 80% of typical machining needs at 50‑70% lower cost than multi‑axis systems.
Your action steps:
1. Audit your part designs – Identify features that actually require 5 axis. Most designers over‑specify. Change undercuts into separate components or accessible angles.
2. Request three quotes – Use the cost table above as a benchmark. Ask each shop to suggest one cost reduction (eg, relaxing a non-critical tolerance from ±0.001″ to ±0.005″ often cuts price by 30%).
3. Run a test part – Send the same simple geometry to two shops. Compare quality, communication speed, and on‑time delivery before committing volume.
4. Optimize for 3 axis from the start – Design parts that can be machined in a single setup. Avoid features requiring multiple flips – each flip adds setup cost and tolerance risk.
For immediate next steps: Download a 3 axis machining DFM checklist (Design for Manufacturability) and review your current parts. A 15‑minute design change can save $500‑2000 per batch. Start with one part today – modify any feature that requires a 5 axis machine, then quote the 3 axis version. The savings will prove the point.


