This guide provides a complete overview of metal fabrication for furniture accessories—covering common types, material selection, fabrication methods, and quality control. Whether you are a furniture manufacturer, a designer, or a DIY enthusiast, you will find actionable steps to choose or produce durable, high-quality metal components for chairs, tables, cabinets, and shelving units.
01What Are Metal Fabrication Furniture Accessories?
Metal fabrication furniture accessories refer to functional or decorative components made from metal through cutting, bending, welding, and assembling processes. These include:
Structural supports (legs, brackets, corner braces)
Motion hardware (hinges, drawer slides, swivel mechanisms)
Connection parts (screws, bolts, cam locks, joining plates)
Finishing accents (handles, knobs, trim, caps, feet)
Adjustable elements (levelers, folding mechanisms, telescopic rails)
Common base metals: steel (carbon, stainless), aluminum, brass, copper, and iron. Each offers different strength, weight, corrosion resistance, and cost profiles.
02Why Choose Metal Fabrication for Furniture Accessories?
Metal provides superior load-bearing capacity, long-term durability, and design precision compared to plastic or wood. In a real-world scenario: a mid-sized office furniture maker needed 5,000 adjustable steel leg sets for standing desks. Using laser-cut steel tubing with robotic welding, they achieved consistent height tolerance of ±0.5mm, supporting 120kg per leg—something injection-molded plastic could not guarantee. Another example: a custom kitchen cabinet shop switched from wooden drawer slides to fabricated stainless steel slides, eliminating warping and reducing customer complaints by 90% over two years.
03Key Metal Fabrication Processes for Furniture Accessories
| Process | Typical Use | Advantage |
|---|---|---|
| Laser cutting | Precision profiles for brackets, hinges | No tooling cost, ±0.1mm accuracy |
| CNC punching | Holes, slots, vent patterns | High speed for repetitive parts |
| Press braking | Bending legs, corner brackets, clips | Repeatable angles up to 135° |
| Robotic welding | Joints for frames, base assemblies | Strong, clean welds, minimal spatter |
| Tube bending | Curved legs, armrests, handles | Continuous grain structure, no cracking |
| Surface finishing | Powder coating,anodizing, plating | Corrosion resistance + aesthetics |
04Material Selection Guide – Matching Metal to Application
Carbon steel – Best for heavy-duty structural accessories (table frames, shelf brackets). Cost-effective but requires anti-rust coating. Example: industrial workbench legs.
Stainless steel (304/316) – Ideal for wet environments (bathroom vanities, outdoor furniture, commercial kitchens). No coating needed, but higher material cost.
Aluminum – Lightweight and rust-proof. Suitable for portable furniture, folding mechanisms, and decorative trims. Lower tensile strength – not for high-impact loads.
Brass/Copper – Premium aesthetic for handles, knobs, inlays. Naturally antimicrobial. Softer metals – avoid stress-bearing parts.
Common mistake to avoid: Using untreated mild steel for outdoor furniture accessories. In one case, a patio furniture startup saw rust within three months on iron leg caps. Solution: switch to galvanized steel or apply powder coating with 80μm thickness (ISO 12944 standard).
05Quality Assurance – What to Verify Before Ordering
When sourcing metal fabricated accessories, check these three documents:
1. Material certificate – Mill test report (MTR) confirming grade and chemical composition.
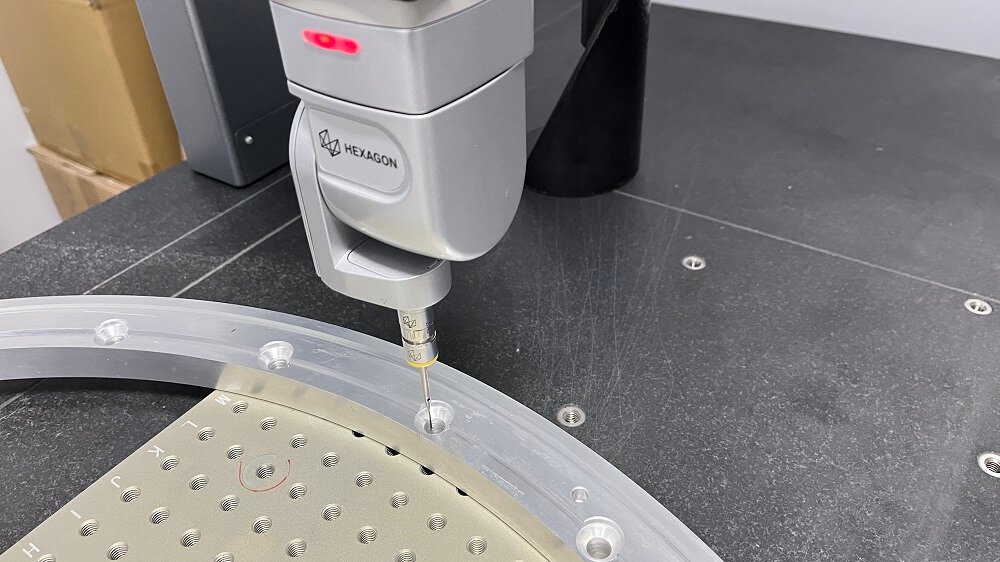
2. Dimensional report – First article inspection (FAI) with critical dimensions marked.
3. Finish test – Cross-hatch adhesion for coatings, salt spray hours for corrosion resistance (e.g., 240 hours for outdoor use).
Real-world example: A furniture importer rejected 10,000 drawer pull handles because the nickel-chrome plating failed a 48-hour salt spray test (required 72 hours). The fabricator had skipped the copper underlayer. Always demand third-party test records.
06Step-by-Step: How to Order Custom Metal Furniture Accessories
Step 1 – Define function & load requirements
Calculate maximum static/dynamic load. For a chair swivel mechanism: multiply user weight (120kg) by safety factor 1.5 = 180kg minimum rating.
Step 2 – Choose material & finish
Use the selection matrix above. For indoor office accessories, pre-galvanized steel with powder coating (RAL color) is standard.
Step 3 – Provide technical drawings
Include 2D PDF with tolerances (e.g., ±0.2mm for holes) and 3D STEP file. Specify weld symbols if needed.
Step 4 – Request prototypes
Always order 5-10 samples before mass production. Test assembly with your actual furniture frame. Example: A cabinet maker found that a prototype bracket interfered with drawer closing – fixed by moving the mounting hole 3mm.
Step 5 – Establish quality limits
Define acceptable defect levels (AQL 1.5 for major defects, 4.0 for minor). Include visual standards for scratches (e.g., no visible scratches longer than 10mm on class-A surfaces).
Step 6 – Plan logistics
Ask about packaging: individual PE bags + corrugated dividers prevent scratching. For large orders (10,000+ pieces), bulk cartons with foam lining are cost-effective.
07Cost Factors & How to Reduce Them
Material accounts for 40-60% of total cost. Reduce by using thinner gauge (e.g., 1.5mm instead of 2mm) if load allows.
Tooling – Laser cutting has zero tooling; stamping dies cost $500-$5,000 but lower per-piece price above 5,000 units.
Finishing – Batch powder coating costs ~$2/m²; individual polishing adds $0.50-$1 per piece.
Assembly – Pre-assembled hinges cost more but save your production line time.
Case study: A lighting fixture maker needed 20,000 brass mounting plates. By switching from 3mm to 2.5mm thickness (still passing load test) and combining laser cutting with barrel tumbling instead of manual deburring, they cut unit cost from $1.20 to $0.85 – saving $7,000 total.
08Common Failure Modes & Prevention
| Failure | Root Cause | Prevention |
|---|---|---|
| Weld cracking | Too rapid cooling on carbon steel | Preheat to 150°C; use low-hydrogen rods |
| Thread stripping | Wrong tap size for material thickness | Use thread inserts for soft metals (aluminum, brass) |
| Surface bubbling | Outgassing from cast metal during coating | Vacuum degas before powder coating |
| Bent legs after welding | Unbalanced heat input | Use jigs and post-weld straightening |
09Actionable Conclusion – Your Next Steps
Core takeaway: Metal fabrication gives you unlimited design freedom for furniture accessories, but success depends on matching material, process, and quality verification to your actual load and environment conditions.
Immediate actions:
1. Audit your current accessories – List each component (legs, hinges, handles). Identify failure points (rust, bending, loose joints).
2. Create a specification sheet – For each accessory, write down: material grade, finish type, tolerance, load requirement, and test standard (e.g., BIFMA X5.1 for office furniture).
3. Contact three fabricators – Send the same drawing and ask for: sample cost, lead time, and quality control plan. Compare not just price but also included testing (e.g., free salt spray report).
4. Test before committing – Run a pilot order of 100-200 pieces. Assemble into finished furniture and perform accelerated life testing (e.g., 10,000 cycle open-close for hinges).
Remember: The cheapest quote often skips critical finishing or inspection. A furniture brand that ignored this lesson had to recall 2,000 tables because of collapsing leg brackets – the fabricator used undersized tubing (1.2mm instead of specified 1.8mm). Always verify with a micrometer upon delivery.
By following this guide, you will reduce defects, extend product lifespan, and build a reliable supply chain for metal fabrication furniture accessories. Start with one accessory type, apply the steps above, and scale what works.