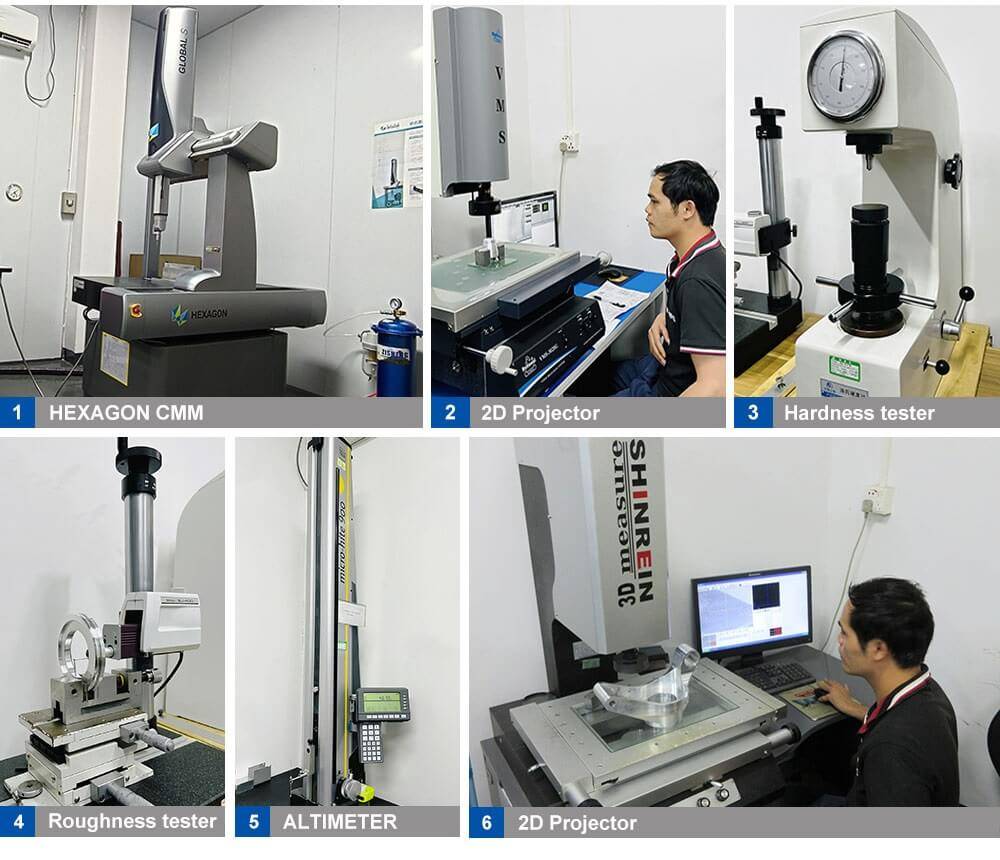
Welding sheet metal parts, especially thin-gauge materials, requires precise heat control and proper technique. Without them, issues such as warping, burn-through, or weak joints can occur easily. The most effective approach is to use short, intermittent welds, such as tack welding, stitch welding, or skip welding, combined with proper clamping and heat sinks to reduce heat concentration and distortion.
The following five practical tips are based on common workshop scenarios, including automotive patch panels, HVAC ducts, and other thin sheet metal structures. They can help you achieve stronger, more stable, and distortion-free welding results. For sheet metal projects that require good appearance, dimensional stability, and joint strength, YPMFG also recommends evaluating material thickness, welding sequence, and clamping methods before welding begins.
1. Use the Shortest Weld Possible (Tack/Stitch Welding)
Continuous beads concentrate heat and cause rapid distortion. Instead, place small tack welds 1–2 cm long, spaced evenly. For example, when repairing a rusted car floor pan, start with tacks every 5 cm along the seam, then go back and fill gaps with alternating tacks. This “skip welding” pattern lets each spot cool before adding heat nearby, reducing warping by up to 70% compared to a single long bead.
2. Clamp Parts to a Heat Sink (Copper or Aluminum Backer)
Thin sheet metal (under 1.5 mm) easily burns through. Clamp a thick copper or aluminum bar behind the joint. These metals draw heat away rapidly, preventing melt-through while producing a cleaner weld face. In a common HVAC duct repair, a copper backer allowed welding 0.8 mm galvanized steel without burn holes—something impossible with air backing alone.
3. Lower Your Amperage and Use Small-Diameter Wire/Electrode
For MIG welding sheet metal, use 0.023-inch (0.6 mm) wire instead of 0.035-inch (0.9 mm). Set voltage to the lowest stable setting where the wire still melts smoothly. For TIG or stick, reduce amperage by 20–30% from what you’d use on 3 mm plate. A real-world test: welding two 1.2 mm mild steel sheets, dropping from 90A to 65A eliminated burn-through while still achieving full penetration.
4. Clean Edges and Fit-Up with Minimal Gap
Mill scale, rust, or oil causes erratic arcs and porosity. Grind both sides of the joint to bare metal within 1 cm of the weld zone. Ensure edges touch with no gap larger than half the material thickness. When fabricating a sheet metal box,gaps over 0.5 mm led to blowouts and excessive filler use—closing the gap allowed perfect tacks.

5. Allow Cooling and Peen Between Welds
After each tack, wait 10–15 seconds or use compressed air to cool the area. Lightly peen the cooling weld with a ball-peen hammer to relieve shrinkage stresses. In a case of welding a stainless steel kitchen backsplash (0.9 mm thick), peening and forced air cooling reduced visible distortion to near zero, while an identical panel without cooling showed 4 mm of bow.
Core Principle to Repeat: Control heat input, distribute heat evenly, and let the metal cool frequently. No single technique works alone; combine short welds, heat sinks, low amperage, tight fit-up, and active cooling.
Actionable Recommendations for Your Next Project
Before welding critical parts, practice on scrap material with the same thickness and material type. This allows you to confirm whether the current, voltage, travel speed, and heat input are suitable.
Keep copper backing plates and aluminum clamps at your welding station. Copper backing plates help absorb excess heat and reduce the risk of burn-through, while aluminum clamps help hold the sheet in place and minimize distortion during welding.
For thin sheets under 0.8 mm, consider using pulsed MIG or TIG with pulse settings. If pulse control is not available, use even shorter and smaller tack welds, such as 5 mm long tacks, to reduce heat concentration.
After welding, check the part for warpage with a straightedge. If minor distortion is present, gently heat the opposite side with a torch and quench it to help pull the material back into shape.
By following these five tips, you can consistently produce clean, strong welds on sheet metal parts while avoiding the frustration of burn-through and warped assemblies. YPMFG recommends testing your settings on scrap before every critical weld. This single habit can save more time and material than almost any corrective step later.