Custom sheet metal fabrication is the process of cutting, bending, and assembling thin metal sheets into custom parts or enclosures. Whether you need a prototype for a new product, a one-off bracket, or a small batch of electronic housings, getting the fabrication right the first time saves you time, money, and repeated revisions. This guide walks you through the essential steps, common pitfalls, and proven best practices — so you can confidently order custom sheet metal parts that meet your exact specifications.
01What Exactly Is Custom Sheet Metal Fabrication?
Custom sheet metal fabrication transforms flat metal sheets (typically steel, aluminum, stainless steel, or copper) into finished components through three primary operations:
Cutting – Using laser, plasma, waterjet, or shearing to cut the blank shape from a sheet.
Bending – Using press brakes to form angles, channels, or complex geometries.
Assembling – Welding, riveting, or fastening multiple parts into a final assembly.
For example, a common case: an engineer needs a custom enclosure for a control panel. The sheet metal shop starts with a 1.5mm thick galvanized steel sheet, laser-cuts the outline and mounting holes, then bends four sides to form a box, and finally welds the corners. The result is a rigid, durable enclosure that perfectly fits the internal components.
02Why Most Custom Sheet Metal Projects Fail – And How to Avoid That
Three frequent mistakes cause delays, cost overruns, or unusable parts:
Mistake 1: Ignoring material thickness and bend radius limits
If you design a sharp internal corner (e.g.,0mm radius) on a 3mm thick steel sheet, the material will crack during bending. Solution: Always follow the minimum inside bend radius rule – typically 0.5 to 1 times material thickness for mild steel, larger for harder alloys.
Mistake 2: Forgetting about flat pattern development
A 3D design that looks perfect on screen may not unfold correctly. Example: a box with four folded sides requires precise calculation of bend deductions. Without that, the final part will have wrong overall dimensions. Solution: Request a flat pattern drawing from your fabricator before production.
Mistake 3: No clear tolerance specification
A bracket for a heavy machine might need ±0.5mm on hole positions, while a decorative cover may allow ±2mm. Without specifying tolerances, you may receive parts that are technically “made” but don’t assemble. Solution: Always state critical tolerances on your drawing (e.g., “All hole positions ±0.3mm, overall dimensions ±0.8mm”).
03Step-by-Step Process to Get High-Quality Custom Parts
Follow these five steps to ensure your project runs smoothly:
Step 1 – Finalize your design with manufacturability in mind
Use uniform bend radii when possible.
Keep hole diameters at least equal to material thickness.
Avoid tight-tolerance features unless absolutely necessary.
Real-world example: A startup needed 50 custom stainless steel brackets. They originally specified ±0.1mm on every dimension, which increased cost by 300%. After reviewing, they relaxed non-critical tolerances to ±0.5mm and saved $1,200.
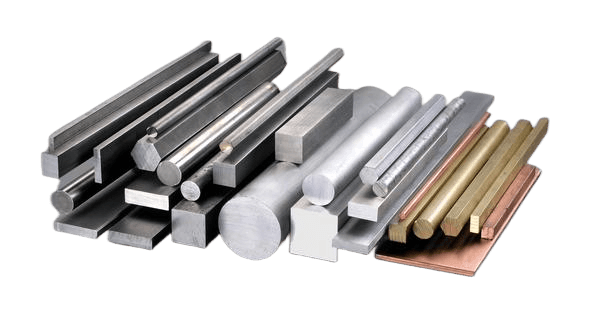
Step 2 – Choose the right material
| Material | Best for | Key property |
|---|---|---|
| Mild steel (Q235, SPCC) | Enclosures, brackets, structural parts | Low cost, easy to weld |
| Stainless steel (304, 316) | Medical, food, outdoor equipment | Corrosion resistance |
| Aluminum (5052, 6061) | Lightweight electronic housings, heat sinks | Good strength-to-weight ratio |
| Copper / Brass | Decorative, conductive parts | Aesthetic, high conductivity |
Step 3 – Prepare a complete technical package
Your fabricator needs:
3D model (STEP or IGES)
2D drawing with dimensions, tolerances, surface finish requirements
Quantity (prototype, low-volume, or mass production)
Any secondary operations (powder coating, anodizing, plating, deburring)
Step 4 – Request a design for manufacturability (DFM) review
A reputable shop will return a DFM report highlighting potential issues. For example, they may suggest splitting a complex part into two simpler pieces and welding them, or changing the bend direction to avoid tooling collisions. Never skip this step – it prevents costly mistakes.
Step 5 – Approve a sample before full production
For quantities above 10 pieces, always get a first-article sample. Measure all critical dimensions, test fit in your assembly, and check surface finish. Only after you approve the sample should the shop proceed with the full batch.
04How to Estimate Cost and Lead Time
Custom sheet metal pricing is driven by three factors:
Material – Larger sheet size and thicker gauge cost more. For one-off parts, material can be 30–50% of total cost.
Setup & tooling – Laser cutting has minimal setup; bending requires tool changes (die and punch selection). Complex parts with many different bend angles increase setup time.
Secondary operations – Welding, grinding, and surface finishing add 20–200% to base fabrication cost.
Typical lead times (common cases):
Simple prototype (1–5 pcs, laser + bend only): 3–5 business days
Small batch (20–100 pcs, with finishing): 10–15 business days
Large production (500+ pcs, optimized tooling): 3–4 weeks
Example: A company needed 200 aluminum heat sink covers. By combining all parts on a single sheet layout and using the same bend angle for all folds, they reduced material waste from 35% to 12% and cut lead time by 6 days.
05Quality Control – What You Must Check Before Acceptance
When you receive your parts, inspect them against these criteria:
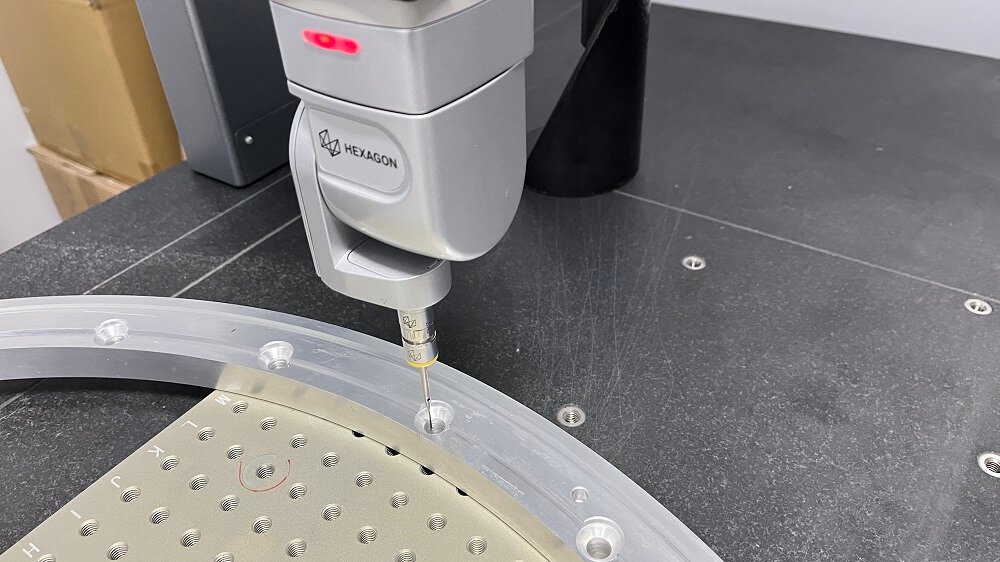
Dimensional accuracy – Use calipers or a CMM for critical holes and outer dimensions. Acceptable deviation: ±0.2mm for laser-cut holes, ±0.5mm for bend-to-bend distances (on 1.5–3mm material).
Surface condition – No sharp burrs, scratches deeper than 10% of material thickness, or rust spots (on uncoated steel).
Bend consistency – All bends should have clean angles with no cracking on the outer radius.
Flatness – Lay the part on a flat surface. Warpage should not exceed 1mm per 300mm length.
If you find defects, document them with photos and measurements, then work with your fabricator on rework or credit. Most quality issues come from miscommunication – always refer back to the agreed DFM report and sample approval.
06Action Plan for Your Next Custom Sheet Metal Project
To summarize and ensure success:
1. Do not start without a DFM review – It costs nothing but prevents 90% of problems.
2. Specify tolerances only where needed – Tighter is not better; it’s more expensive and slower.
3. Order a sample for any run over 10 pieces – A $50 sample can save a $5,000 mistake.
4. Keep a simple material and finish standard – Changing alloys or coatings mid-project causes delays.
5. Communicate in drawings, not just words – A clear 2D drawing with notes is legally binding and eliminates guesswork.
Final core recommendation: For any custom sheet metal fabrication – whether a single bracket or a thousand enclosures – always begin by sending your design to the shop for a manufacturability review. Then produce one sample, inspect it thoroughly, and only then release the full order. This three-step gate process (DFM → Sample → Approval) is the industry-proven method used by engineers who get perfect parts on time, every time.