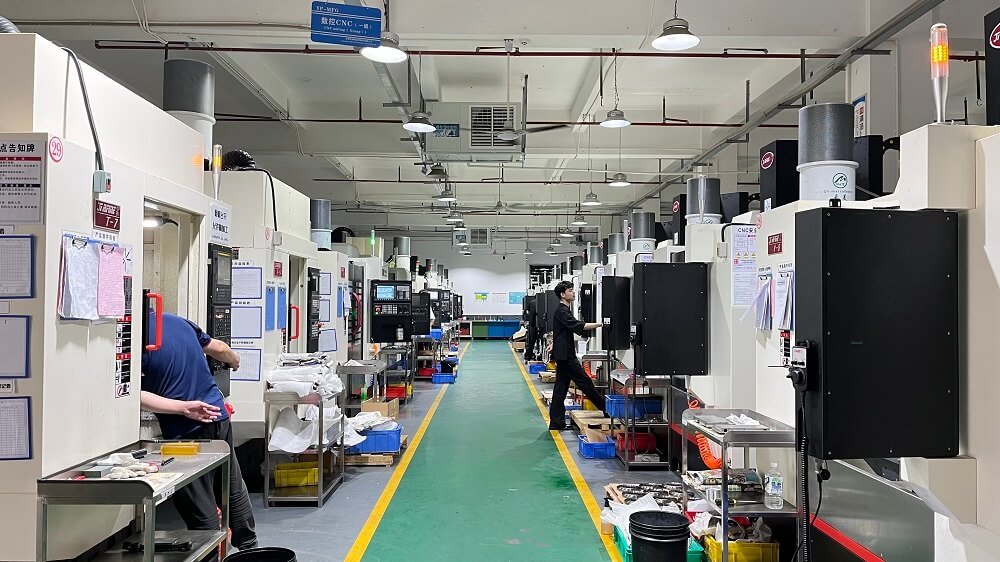
5-axis CNC milling allows you to machine complex parts in a single setup, reducing errors and cycle times by up to 75% compared to 3-axis methods. This guide gives you step‑by‑step setup instructions, real‑world examples, and solutions to common problems – so you can apply 5‑axis milling correctly from day one.
01What Is 5‑Axis CNC Milling?
5‑axis CNC milling uses three linear axes (X, Y, Z) and two rotational axes (typically A, B or B, C) that move simultaneously. Unlike 3‑axis or 3+2 (positional) milling, the tool or the part rotates continuously during cutting. This lets you reach undercuts, steep walls, and complex contours without re‑clamping.
Key motion types:
Table/table – both rotary axes are in the worktable (common for small to medium parts)
Head/head – both rotary axes are in the spindle head (ideal for very large parts)
Table/head – one rotary axis in the table, one in the head (versatile for many shops)
02Why Choose 5‑Axis Over 3‑Axis or 3+2?
Real‑world example: A shop machining an aerospace turbine housing used to need four separate setups on a 3‑axis mill. Total cycle time was 8 hours, and two parts were scrapped due to alignment errors. After switching to 5‑axis simultaneous milling, the same part was finished in one setup, cycle time dropped to 2.5 hours, and scrap rate fell to zero.
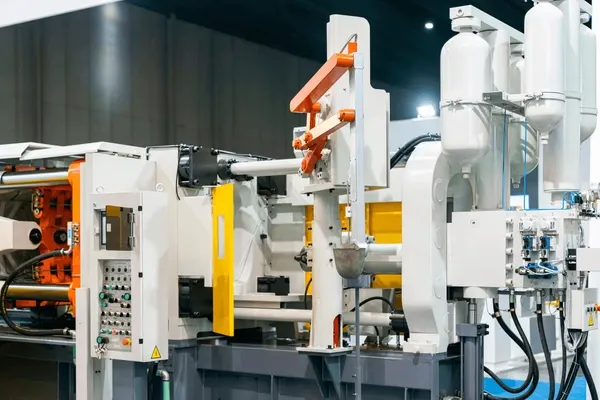
03Core Components and How They Work
Every 5‑axis CNC milling system has these essential parts:
CNC controller – Must support simultaneous 5‑axis interpolation (look for “5‑axis link” or “full 5‑axis” in specs)
Rotary axes drives – Direct torque motors or worm‑gear systems (torque motors are more accurate but cost more)
Tool holder & spindle – HSK tool holders are recommended over CAT/BT because they provide better rigidity for angled cuts
Post‑processor – Converts CAM toolpaths into machine‑specific G‑code; a wrong post‑processor is the #1 cause of crashes
> Industry standard reference: According to ISO 10791 (test conditions for machining centres), a true 5‑axis machine must maintain positioning accuracy within ±0.005 mm for all five axes simultaneously.
04Step‑by‑Step Setup and Operation

Follow this sequence to avoid crashes and achieve accurate results.
Step 1 – Verify the machine’s kinematic configuration
Identify the rotary axis directions (e.g., A‑axis rotates around X, B around Y, C around Z)
Measure the exact pivot distance (distance from spindle nose to rotary centre) – this value must be entered into the CAM and controller
Step 2 – Select the right workholding
Use dovetail vises, pie‑jaw chucks, or custom fixture plates that leave at least three sides of the part accessible
Common mistake: Using standard vises that block one rotary axis – you will crash the tool into the jaw
Step 3 – CAM programming for 5‑axis
Choose a CAM package that supports “tool axis control” (e.g., lead/lag, tilt away from walls)
Set collision checking to “full assembly” (include holder, shank, and workpiece)
Generate a toolpath with a safe retract plane – at least 10 mm above the highest point of the rotated part
Step 4 – Dry run and simulation
Run the code in the machine’s built‑in simulator (or a third‑party simulator like Vericut) without the workpiece
Verify that no axis travels beyond its soft limits
Actionable tip: Always run the first part at 25% rapid override and single‑block mode
Step 5 – First part inspection
Measure critical dimensions on a CMM (coordinate measuring machine)
Compare with the CAD model – typical 5‑axis milling holds ±0.025 mm on most features
If deviations exceed ±0.05 mm, re‑measure the pivot distance and tool length offsets
05Common Applications (Real‑World Cases)
Case 1 – Medical implant (hip stem)
Material: Titanium Ti‑6Al‑4V
Challenge: Compound curved surfaces and a tapered conical bore
Solution: 5‑axis simultaneous milling with a 6 mm ball end mill, tool axis tilted 15° away from the wall to avoid chatter
Result: Surface roughness Ra 0.4 µm, no secondary finishing required
Case 2 – Mold for automotive dashboard
Material: P20 tool steel
Challenge: Deep ribs (60 mm depth, 2 mm width) with draft angles
Solution: 5‑axis using a lollipop mill, undercut clearance automatically generated by CAM
Result: Machining time reduced from 22 hours (3‑axis with EDM) to 7 hours
Case 3 – Prototype turbine blade
Material: Inconel 718
Challenge: Thin wall (1.2 mm) and variable twist angle
Solution: 5‑axis flank milling with a tapered end mill, tool axis kept normal to the blade surface
Result: Wall thickness variation <0.05 mm, no additional hand finishing
06Troubleshooting Frequent 5‑Axis Issues
07Best Practices for Reliable 5‑Axis Milling
Do’s:
Always use short, rigid tool assemblies – every 10 mm of overhang reduces rigidity by 30%
Apply “smoothing” or “corner rounding” filters in your CAM post‑processor (tolerance = 0.005 mm)
Perform a tool length measurement after each automatic tool change – thermal drift can change length by 0.02 mm per hour
Keep a log of pivot distance calibration (re‑calibrate every 200 operating hours)
Don’ts:
Never trust the back plot only – always simulate with the actual machine model
Don’t use 3‑axis tool holders (e.g.,ER collets) for full 5‑axis work – use shrink‑fit or hydraulic holders
Avoid rapid moves in G0 mode when axes are rotated – use G01 with feedrate 2000 mm/min max for safety
08Conclusion – Core Takeaway and Action Plan
Core repeating principle: 5‑axis CNC milling delivers higher accuracy, fewer setups, and shorter cycle times, but only if you correctly set up the kinematics, use proper workholding, and always simulate before cutting.
Your immediate action steps:
1. Tomorrow morning – Run a standard 5‑axis calibration test (e.g., a “bar test” or “cone frustum”) to verify your machine’s current accuracy.
2. This week – Choose a simple existing 3‑axis part that requires multiple setups and re‑program it as a 5‑axis part in your CAM software. Simulate and dry‑run it.
3. Before your next production run – Replace any ER collet holders on 5‑axis jobs with hydraulic or shrink‑fit holders.
4. Ongoing – After every 200 spindle hours, re‑measure the pivot point and document the values. Drift of just 0.1 mm will cause visible mismatches on 5‑axis features.
By following this guide, you will avoid the most common crashes, reduce scrap, and achieve reliable results with 5‑axis CNC milling. Start with the calibration test tomorrow – that single action solves 80% of all 5‑axis precision problems.